Snowmelt Sprouts & Shepherd’s Surprises
From Flurries to Flavor


🌱 The Daily Benefit: Growing Microgreens with Angel Water
Yesterday, I missed my daily blog—but something quietly beautiful was growing behind the scenes. My daughter’s science experiment turned into something much bigger: a tiny triumph in food security, patience, and the magic of water that fell from the sky.
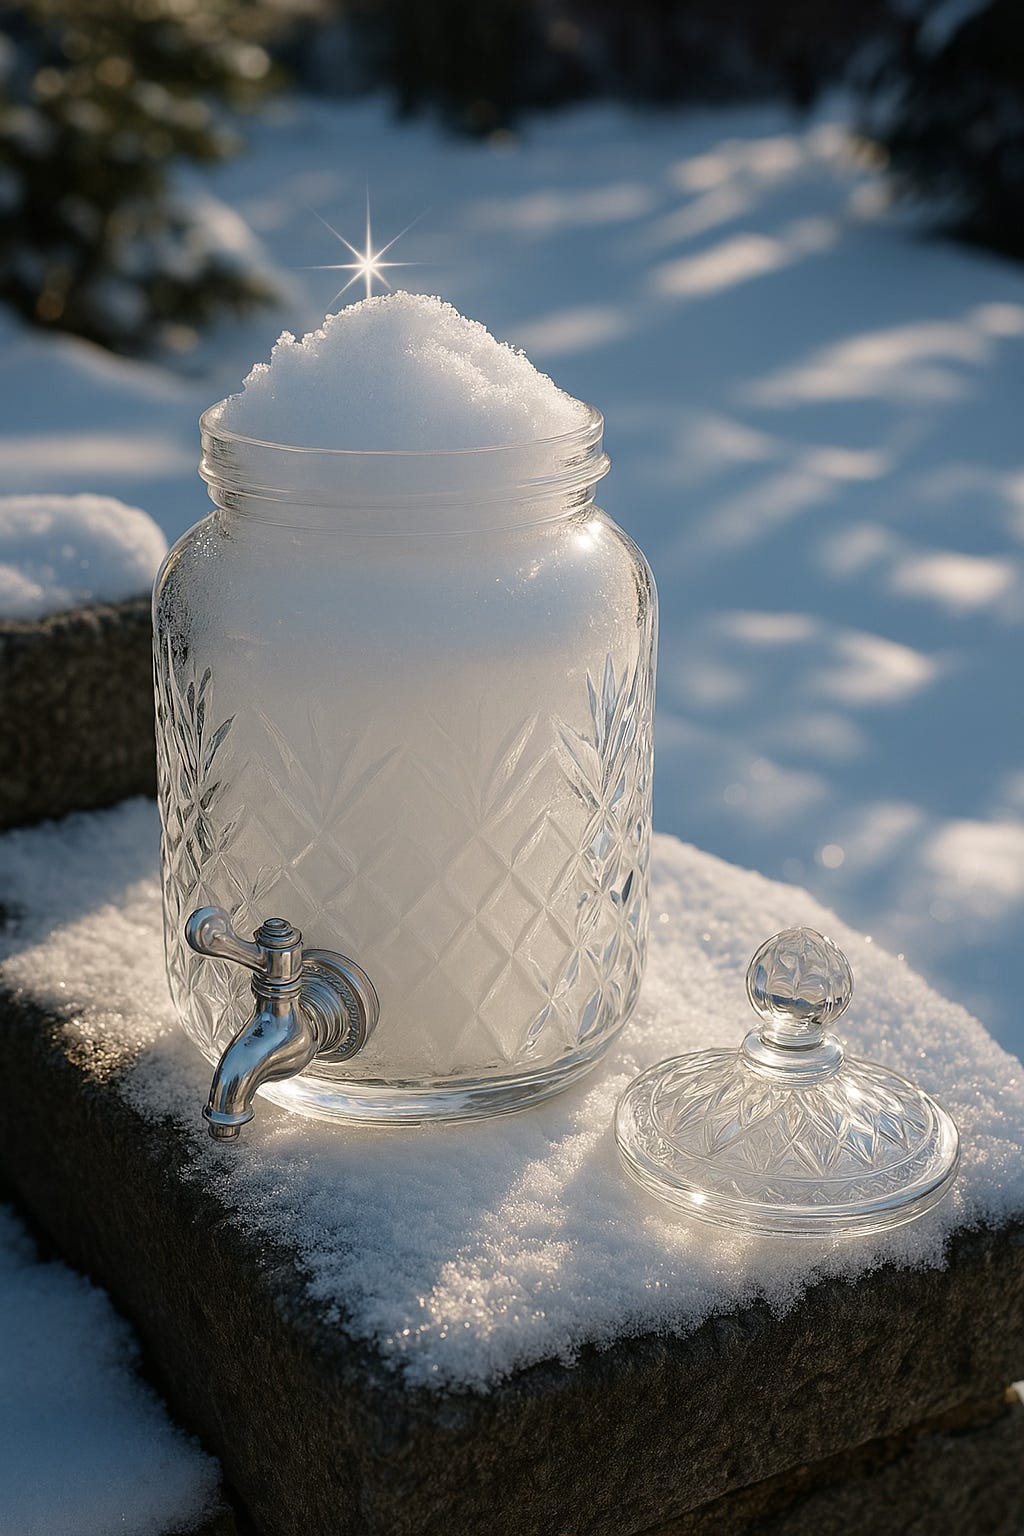
Snowmelt water has always felt sacred to me—like angel water. It falls gently, rests on the Earth, and quietly nourishes life. This week, it nourished our seeds. In just five days, we turned a handful of seeds and a little melted snow into flavorful microgreens that felt like a miracle.
Here are five benefits I discovered while growing microgreens with snowmelt:
💡 1. It Satisfies Natural Curiosity
How much water from nature do you need to grow food? Would it work? How fast? These were questions I didn’t realize I was asking until the experiment gave me answers. It was so comforting to know I could grow something nourishing with water that didn’t come from a tap.
💧 2. Minimal Water, Maximum Results
I used just ¼ cup of water to rinse the seeds daily, then tilted the tray at an angle to allow airflow and drainage—preventing mold and encouraging sprouting. It’s a gentle rhythm that requires little but gives a lot.
🥦 3. Robust, Nutty Flavor
We were surprised by the taste! The microgreens had a deeper, more complex flavor—like a nutty, broccoli-rich bite. It felt clean, alive, and vibrant. Whether it was the snowmelt or just the joy of growing it ourselves, it was delicious.
🧬 4. A Survival Skill Wrapped in Simplicity
In just five days, we had real food. No electricity, no garden plot—just seeds, jars, and a bit of water from the sky. It was a moment of quiet empowerment—knowing that even in tough times, something green can grow.
🌿 5. Science, Spirit, and Soul
This wasn’t just a science fair project—it was a spiritual moment. A reminder that nature provides, and that even snow carries potential. The microgreens felt like a symbol: a little prepper skill tucked inside an act of parenting and play.
🧁 Bonus: April Fools Meets Earth Day
Last year, I posted meatloaf “cupcakes” for April Fools’ Day. This year, I didn’t get to post on the day, but I wanted to share this fun Mini Shepherd’s Pie Puff Pastry idea. It’s warm, hearty, and full of comfort.
To tie in the microgreens: sprinkle them on top as a garnish! Not only is it beautiful and crunchy, it adds that “I grow my own food” vibe that’s both cheeky and nourishing.
🥧 Mini Shepherd’s Pie Puff Pastries (Makes 12)
Meat Filling:
1 lb ground lamb or beef
Olive oil
2 cups diced carrots
1 onion, diced
1½ cups frozen peas
4 cloves garlic, minced
1 tbsp tomato paste
¼ cup red wine
1¼ cups beef broth
2 tbsp Worcestershire sauce
1 tbsp beef seasoning (or salt, pepper, paprika)
1 tbsp garlic herb rub (or thyme, rosemary, parsley, oregano)
1½ tbsp brown gravy
Mashed Potatoes:
3 russet potatoes, peeled & chopped
¾ cup grated cheddar
4 cloves garlic, chopped
3 tbsp heavy cream or half & half
1 egg, whipped
2 tbsp butter
½ tsp salt, ¼ tsp pepper, ¼ tsp nutmeg
Pastry:
1 box puff pastry sheets
Olive oil spray
4–5" cookie cutter
Muffin tin
🔥 Instructions:
Prepare Filling:
Sauté onion, carrots, and peas in olive oil. Add ground meat and cook until browned. Stir in garlic, tomato paste, and wine. Simmer, then add broth, Worcestershire, seasonings, and gravy. Cook 15 minutes.
Make Mashed Potatoes:
Boil potatoes until tender. Drain and mash with butter, cream, egg, and garlic. Mix in cheese, salt, pepper, and nutmeg.
Assemble & Bake:
Preheat oven to 375°F. Cut 4.5” circles from puff pastry. Spray muffin tin and press pastry into wells. Fill with meat mixture, top with mashed potatoes (ice cream scoop works great).
Bake for 25–30 minutes until golden brown.
✨ Garnish with homegrown microgreens for that bright, earthy pop—and a whisper of spring on your plate.
❄️ How to Grow Microgreens with Snowmelt Water
Here’s how we did it—and how you can too:
🧂 What You’ll Need:
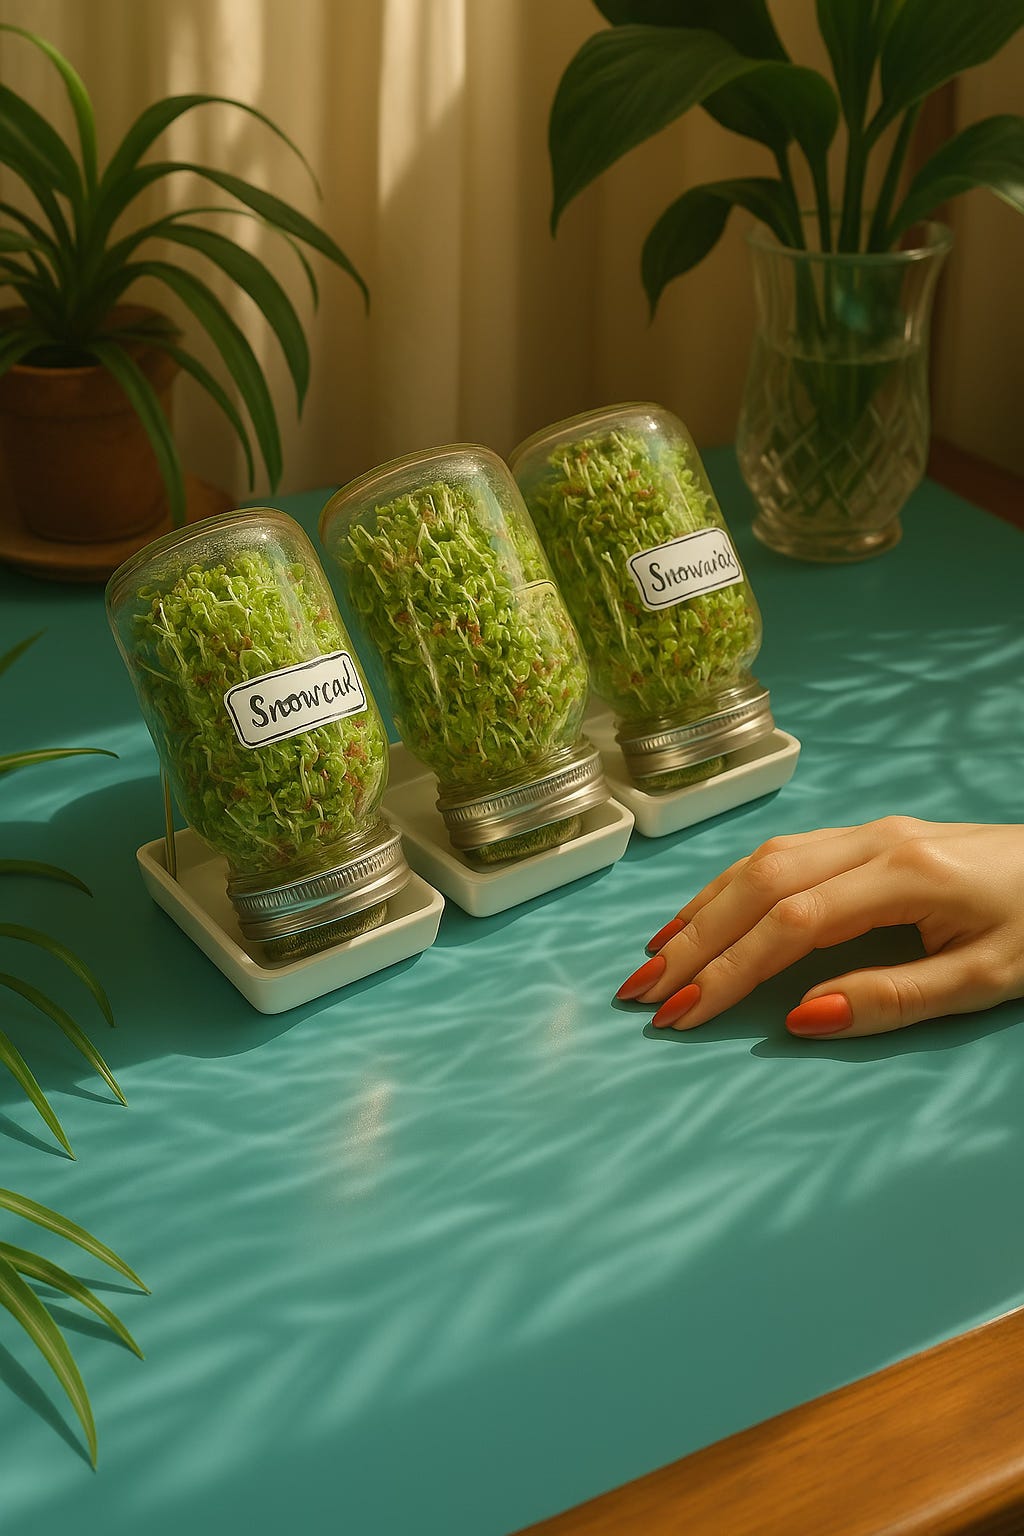
1 tablespoon of microgreen seeds per mason jar (we used broccoli microgreens)
1 wide-mouth mason jar per variety
A fine mesh lid or cheesecloth & rubber band
A rack or bowl to tilt jars for drainage
Around 5¼ cups of clean snowmelt water per jar total for the full 5-day cycle
🌨️ Step-by-Step Instructions:
1. Collect & Melt Snow:
Gather clean snow and allow it to melt in a container. Strain through a coffee filter or cheesecloth if needed. Melted snow becomes your “angel water.”
2. Soak Seeds:
Add 1 tablespoon of seeds to a clean mason jar. Pour in ¼ cup of melted snow water and let the seeds soak for 8–12 hours or overnight.
3. Rinse & Drain Twice Daily:
Drain the soak water in the morning. Rinse with ¼ cup of snowmelt water, gently swirl, and drain completely.
Place the jar at a 45° angle (in a bowl or dish rack) to promote drainage and airflow. Repeat every morning and evening.
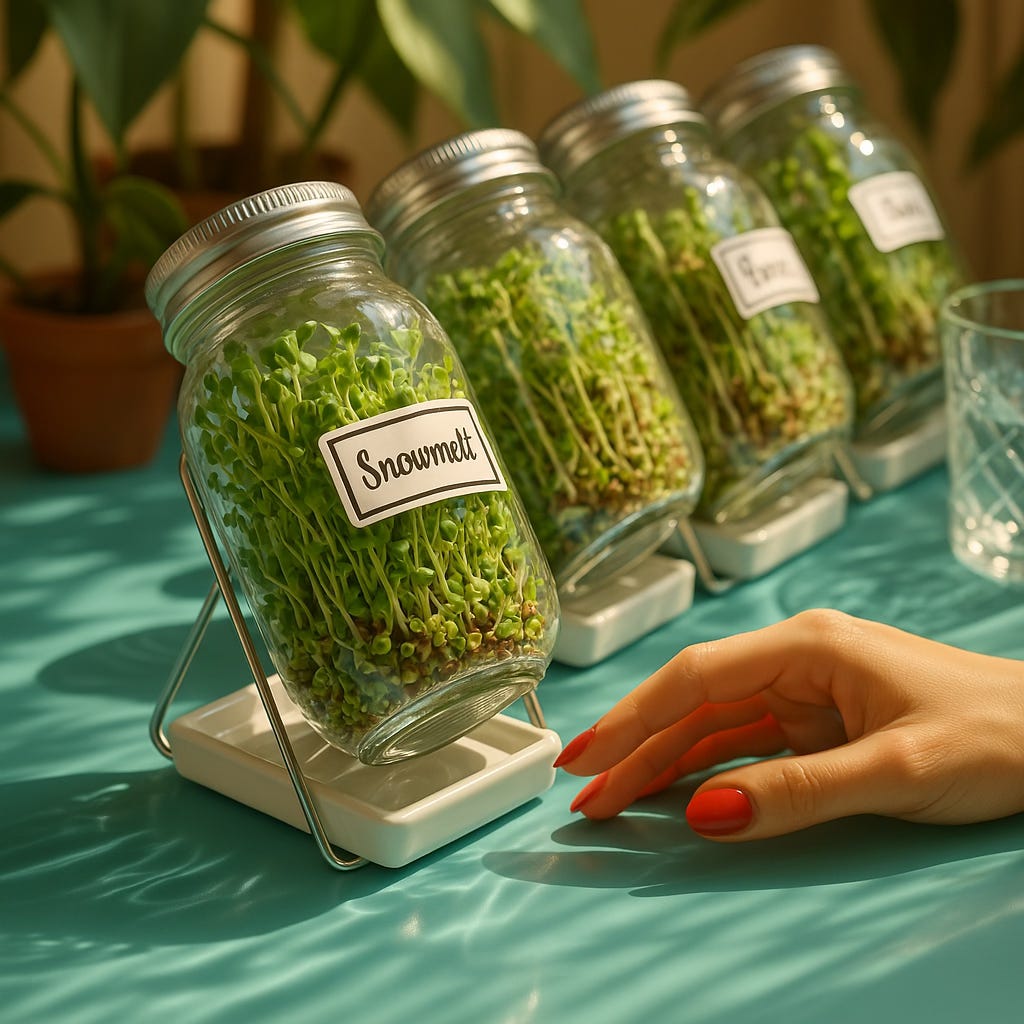
4. Watch Them Grow:
By Day 2 or 3, you’ll see little sprouts forming. By Day 5, you’ll have vibrant, flavorful microgreens ready to snip and serve.
5. Harvest & Enjoy:
Use scissors to trim your greens at the base. Rinse gently and top your meals—like our Mini Shepherd’s Pie Puff Pastries—for a fresh, nutrient-rich finish.